 |
|
 Join Date: Dec 2009
04-24-2013, 3:19 PM
Join Date: Dec 2009
04-24-2013, 3:19 PM
|
Reply
|
Quote:
Originally Posted by bass10after

I take it you're planning on keeping the boat for a long time to come grant? I'm surprised you don't want something roomier in a v-drive config vs. dd. I had a dd for a long time and couldn't wait to get a v drive as soon as the opportunity ($$) came to afford a decent one. I understand to each his own, just curious what you prefer about the dd. Back on track, can't wait to see the project complete, you always do outstanding work.
|
I've wondered this as well. I'd LOOOOOVE to see what grant could do with the space a v-drive has. My guess is that a DD is much easier to work on as much as G takes his boat apart and puts it back together. I'd bet he had touched every nut and bolt on the inside 10 times LOL.
|
|
Join Date: Jun 2005
04-24-2013, 4:15 PM
|
Reply
|
|
I have had my boat since September of 2001 so that's like 12 years old. Each year I seem to do some kind of fun project. I would hate to think about throwing all that work I have done away to only start over with a new boat so yes I don't see getting a new boat anytime soon. We (The wife and I) love the boat and I guess that why I keep re-investing in it with projects like this. Its payed for and for how we use it , it work's awesome. As far as more room in a V drive! Umm all the SAN's of same vintage IMO have less room. And if we need more room we just take out our new boat.
|
|
Join Date: Jun 2005
04-24-2013, 4:27 PM
|
Reply
|
Quote:
|
I wouldn't think real teak would even cost that much. I wonder what it would have cost just to spray gelcoat and put down SeaDek or something similar? I was expecting this to be closer to a $1500 maybe $2000 project. It will look great once finished, but WOW this stings!
|
Jason. I was told A Sea Deck Floor would be in the $1500-$1700 range. The cost to prep and gell the floor of the boat would be THOUSANDS! yes its not a cheep project by any means and I can't see a-lot of people duplicating it. It ended up costing me more because I ended up putting the synthetic teak in places where it didn't need to be like under the gas tank and in the trunk and under the sub boxes. Doing all that extra square footage almost doubled the cost. So it can be done cheaper I just didn't want any seems in my floor and I didn't want unfinished areas.
|
|
Join Date: Feb 2010
04-24-2013, 7:02 PM
|
Reply
|
figures you'd have the most awesome pontoon boat too! Any projects in the works for the water bus yet? I'm sure it helps but looks like you could plumb a 250# sack into the front of that to level it out some  jk jk.
|
|
Join Date: Jun 2005
04-26-2013, 2:45 PM
|
Reply
|
|
I just got these photos from the factory today. The floor ships today.
|
|
Join Date: Feb 2010
04-26-2013, 6:33 PM
|
Reply
|
|
That is going to look amazing!
|
|
Join Date: Jul 2005
04-29-2013, 12:37 PM
|
Reply
|
|
Perhaps it will not be noticable once installed, but initially it looks a bit frustrating that the black lines do not go with the cut pieces. The ski locker door looks to be cut crooked with the material layout
|
|
Join Date: Jan 2010
04-29-2013, 1:24 PM
|
Reply
|
|
Maybe the ski locker is not centered? That is odd.
|
|
Join Date: Jun 2005
04-29-2013, 2:08 PM
|
Reply
|
|
The floor is not symmetrical. The only thing in the "TRUE center of the boat" is the Motor. I guess when you have carpet you cant tell if the boat is wider by a few inches on one side Vs another, but when you add lines like a graph its easy to see. They are going to make some adjustments to the floor panels. When laying it out you cant use a ruler to tell you where this or that should be cause in the end its your eye that matters.
|
|
Join Date: Jul 2007
04-29-2013, 2:55 PM
|
Reply
|
Quote:
Originally Posted by grant_west
I have had my boat since September of 2001 so that's like 12 years old. Each year I seem to do some kind of fun project. I would hate to think about throwing all that work I have done away to only start over with a new boat so yes I don't see getting a new boat anytime soon. We (The wife and I) love the boat and I guess that why I keep re-investing in it with projects like this. Its payed for and for how we use it , it work's awesome. As far as more room in a V drive! Umm all the SAN's of same vintage IMO have less room. And if we need more room we just take out our new boat.
|
Grant, where is this?
|
|
Join Date: Jun 2005
04-29-2013, 3:44 PM
|
Reply
|
|
Joe: Are you asking what lake the pic was taken at? if so its lake tulloch
|
|
Join Date: Jun 2005
04-30-2013, 10:52 AM
|
Reply
|
|
Here is a scanned picture of my template. Plas Deck Is going to re work the border around my engine box. To make things look more symmetrical. This is a classic case Where you have to ignore the center of what the ruler says And go with what I see's
|
|
Join Date: Jun 2005
05-03-2013, 7:21 AM
|
Reply
|
|
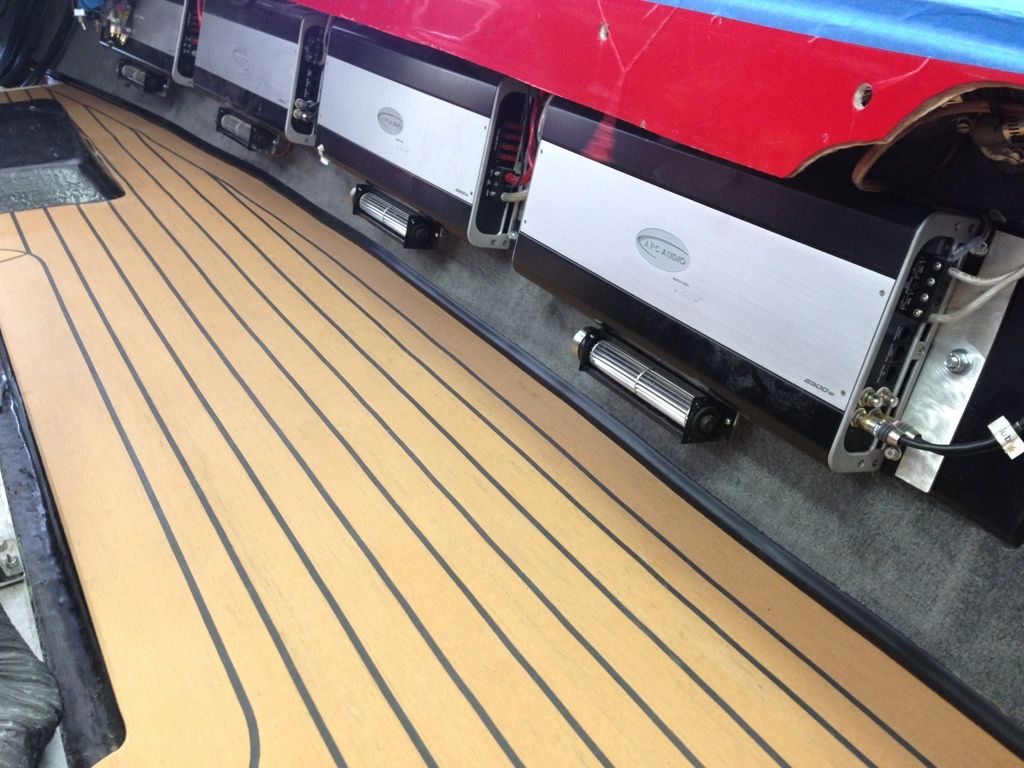
Here is a pic of the finished floor.
|
|
Join Date: Jan 2010
05-03-2013, 7:51 AM
|
Reply
|
|
Looks great!
|
|
Join Date: May 2012
05-03-2013, 8:22 AM
|
Reply
|
|
That looks sick!!
|
|
Join Date: May 2008
05-03-2013, 9:02 AM
|
Reply
|
|
Much better alingment! I may have missed it... How will the flooring be attached? Spray adhesive like carpet?
|
|
Join Date: Jun 2005
05-03-2013, 9:41 AM
|
Reply
|
|
It looks to me like PlasDeck completely rebuilt the floor. After they sent me the pic's of the floor I saw some things that needed work. No questions asked they said Hey we are not happy with the over all look and we want to re-do it. I said no problem. That's when they sent me the digital drawing of the floor and it showed how the floor would lay out and 2 days later we have the final product.
The floor will be glued down with a flexible mastic style glue. It's a thick glue that comes in a sausage gun and then is troweled out and then the floor is rolled out on top of it.
|
|
Join Date: Jun 2005
05-20-2013, 5:54 PM
|
Reply
|
|
The floor showed up last week in this Tube along with all the glue and floor roller and trowel . Everything you need to get started.
|
|
Join Date: Jun 2005
05-20-2013, 5:56 PM
|
Reply
|
|
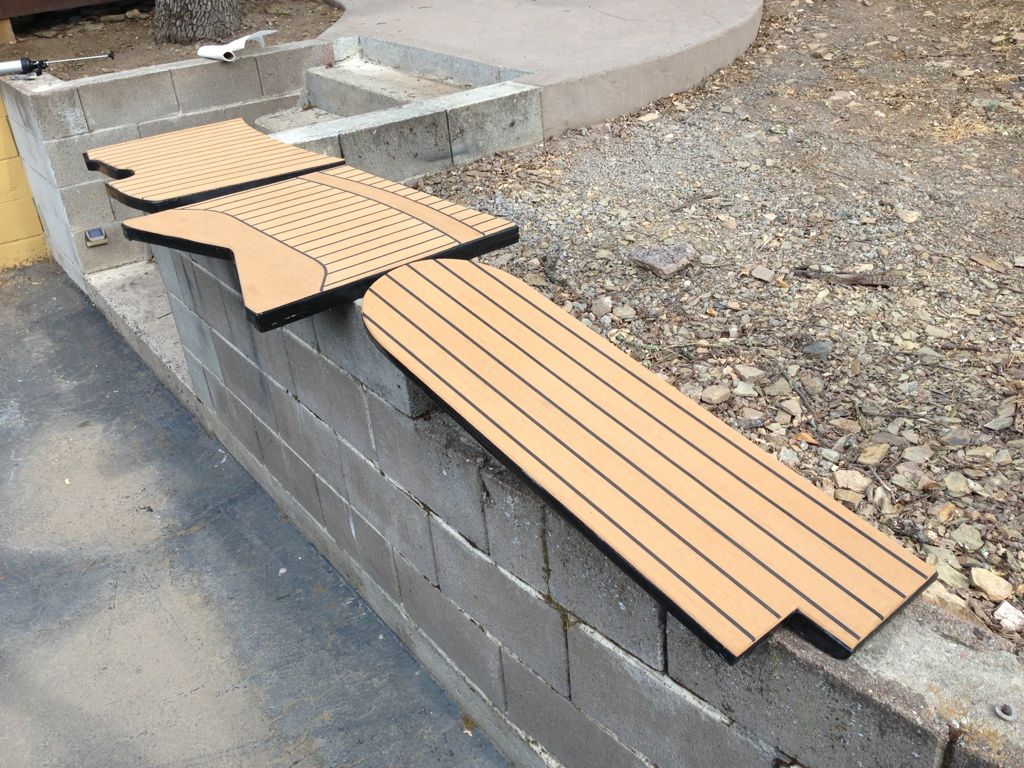
I took the floor out to see how it looked and get it laying flat
|
|
Join Date: Jun 2005
05-20-2013, 5:58 PM
|
Reply
|
|
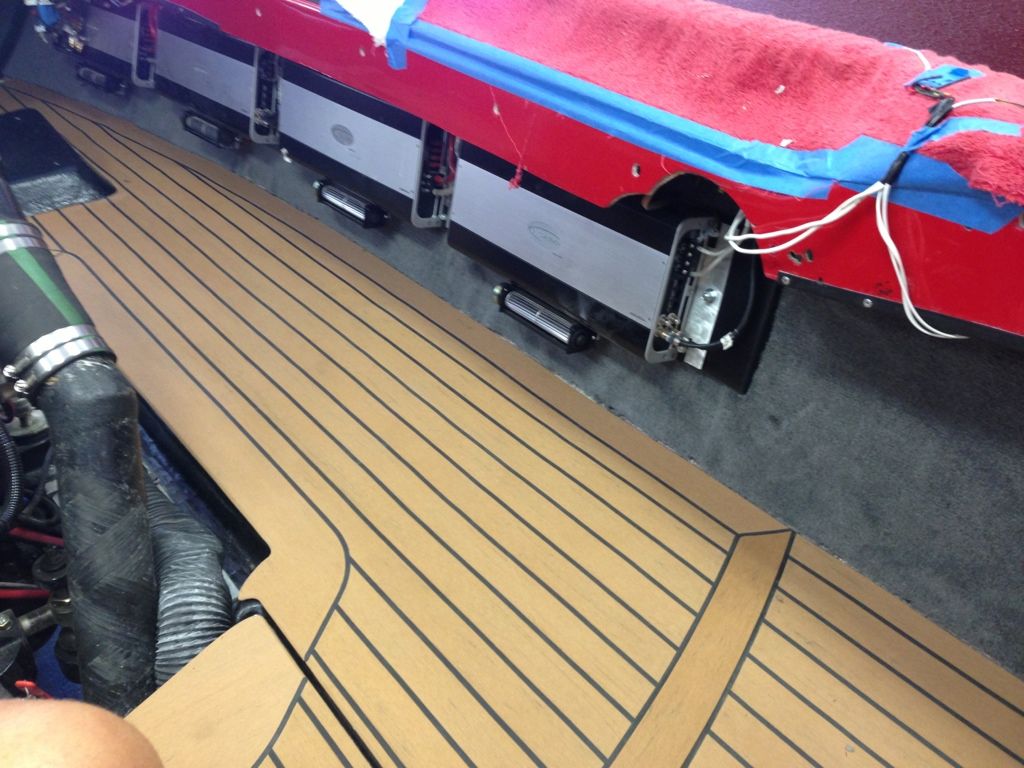
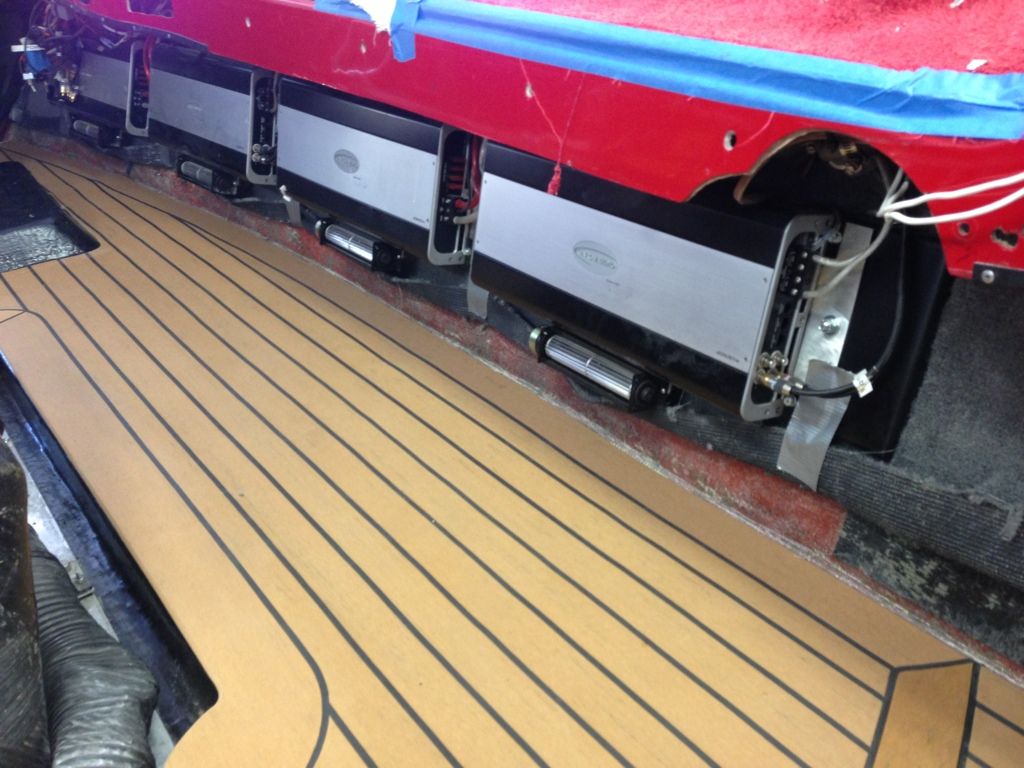
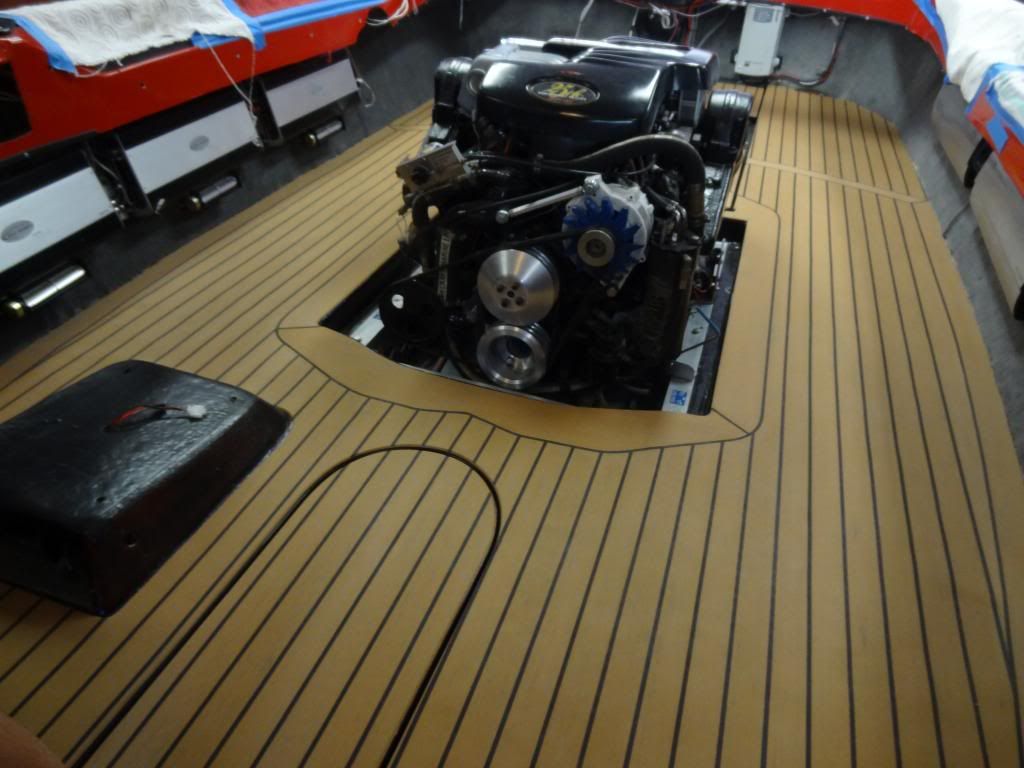
Right out of the tube it rolled out and laid flat. We wanted test fit so we just threw it in.
|
|
Join Date: Jun 2005
05-20-2013, 6:00 PM
|
Reply
|
|
It fit like a glove. I was very happy to Not have to trim or adjust anything. These pieces are just thrown down to see how they fit/laid down.
|
|
Join Date: Jun 2012
05-20-2013, 6:10 PM
|
Reply
|
|
:O
that. looks. awesome.
|
|
Join Date: Jan 2011
05-20-2013, 7:21 PM
|
Reply
|
|
Looks sick!
|
|
Join Date: May 2012
05-20-2013, 7:24 PM
|
Reply
|
|
Wow great job on the layout!! That floor is badass and fit perfect!
|
|
Join Date: May 2010
05-23-2013, 12:13 PM
|
Reply
|
|
awesome project
|
|
Join Date: Mar 2013
05-23-2013, 1:21 PM
|
Reply
|
|
I'm pretty new to this website so I haven't seen any of your other projects, Grant, but I will say that this one is badass! I'll definitely have to go check out some of the others. I'm excited to see the finished product with all of the interior re-installed... gonna look clean! Makes me wish I had some shop space so I could start doing projects like this on my boat.
Since flooring temperature was a big concern for you, I'm assuming you went with the new line of Cool Teak... Can you tell a major difference in the heat coming off this floor vs. the original PlasTeak?
|
|
Join Date: May 2008
05-24-2013, 6:19 AM
|
Reply
|
|
Grant, do you have any plans for filling in some of the gaps between the ski locker/rear deck areas and the floor? The flooring looks great, but those gaps stand out to my eye. Please don't take that as knit-picking, but rather as constructive criticism from someone who has a eye for small details.
|
|
Join Date: Feb 2010
05-30-2013, 10:34 AM
|
Reply
|
any finished install pics yet grant? You had to have made some more progress by now, don't bogart the pics and leave us all in suspense! 
|
|
Join Date: Jun 2005
06-10-2013, 6:04 PM
|
Reply
|
Ok back at it . I have been fixing/upgrading thing's as I go along so progress is slow but it's coming out real nice. So After I test fit the floor I rolled it up and started laying out the glue. PlasDeck provides the glue that you use. It comes in a Sausage roll. It's different from the cardboard style caulking guns and works Very well. You get a lot more per roll and it comes out much easier. I ended up doing the top of the cooler and the foot rest on the pontoon boat here is some photos of how it installs.
Sand the surface

Then i taped out where the glue would go

Lay out the glue

Trowel it out

Remove your tape

Roll it flat

So that's just a example of how the whole floor is glued down,
|
|
Join Date: Jun 2005
06-10-2013, 6:07 PM
|
Reply
|
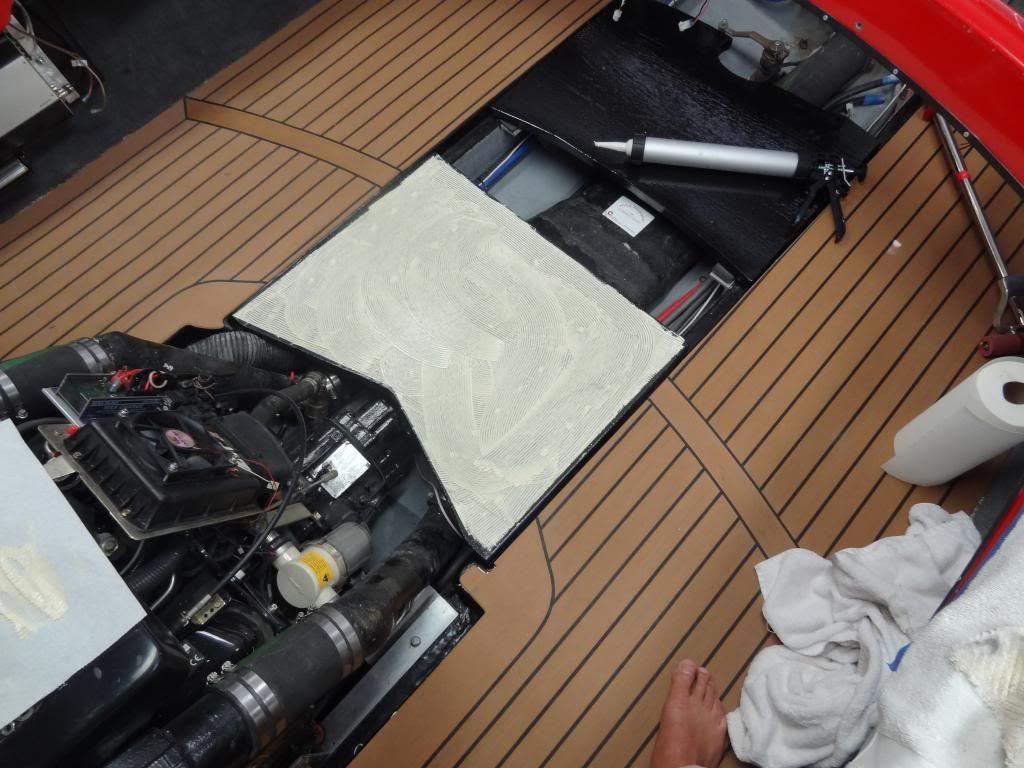
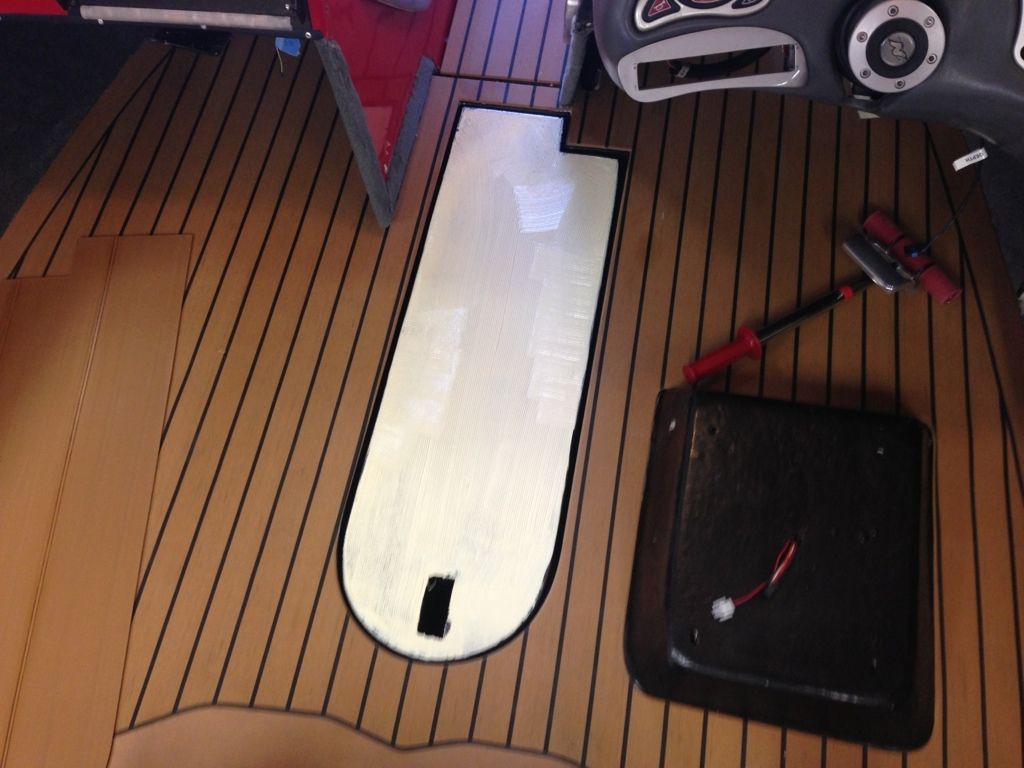
So back to the boat;
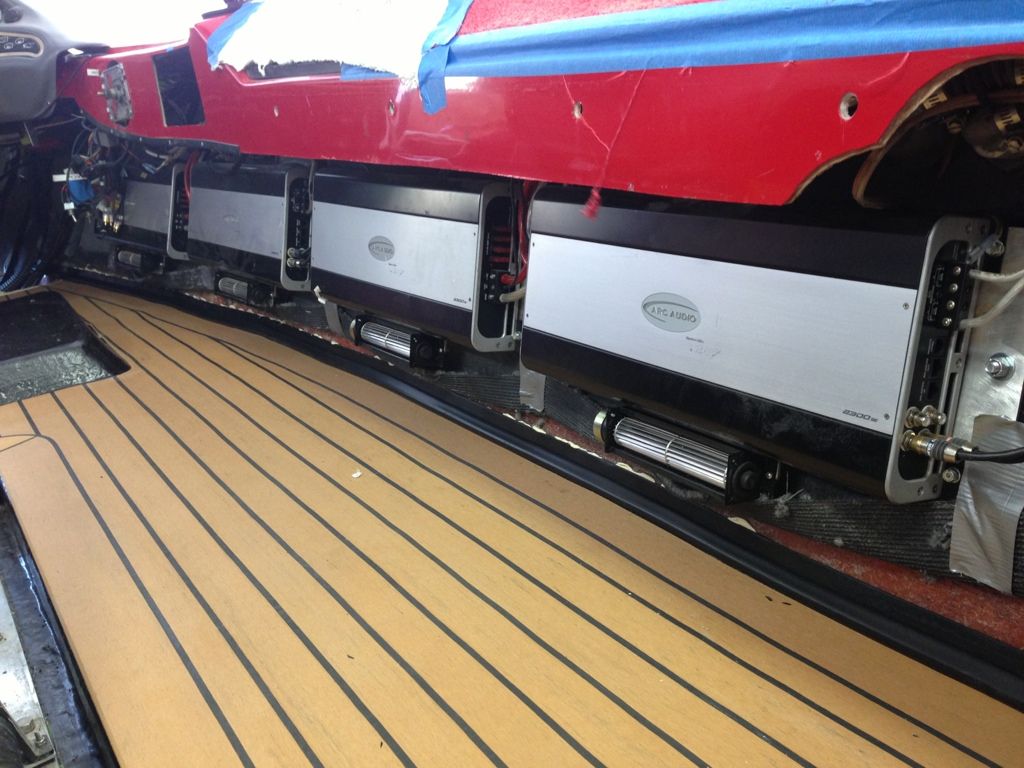
I didn't take a whole lot of photos of it going down. It layed out fairly quick This is 1/2 of the floor being layed down

|
|
Join Date: Jun 2005
06-10-2013, 6:20 PM
|
Reply
|
So this is how the carpet ends and the floor starts. I used the factory Nautique carpet trim. This stuff is usually glued down to the edge of the floor and the carpet go's into it. I chose to stick it to the gunnels and have the carpet end into it.
This is what it looked like when I started
Then I pealed back the carpet and cleaned the gunnels
The I used the same glue for the floor to attach the strips
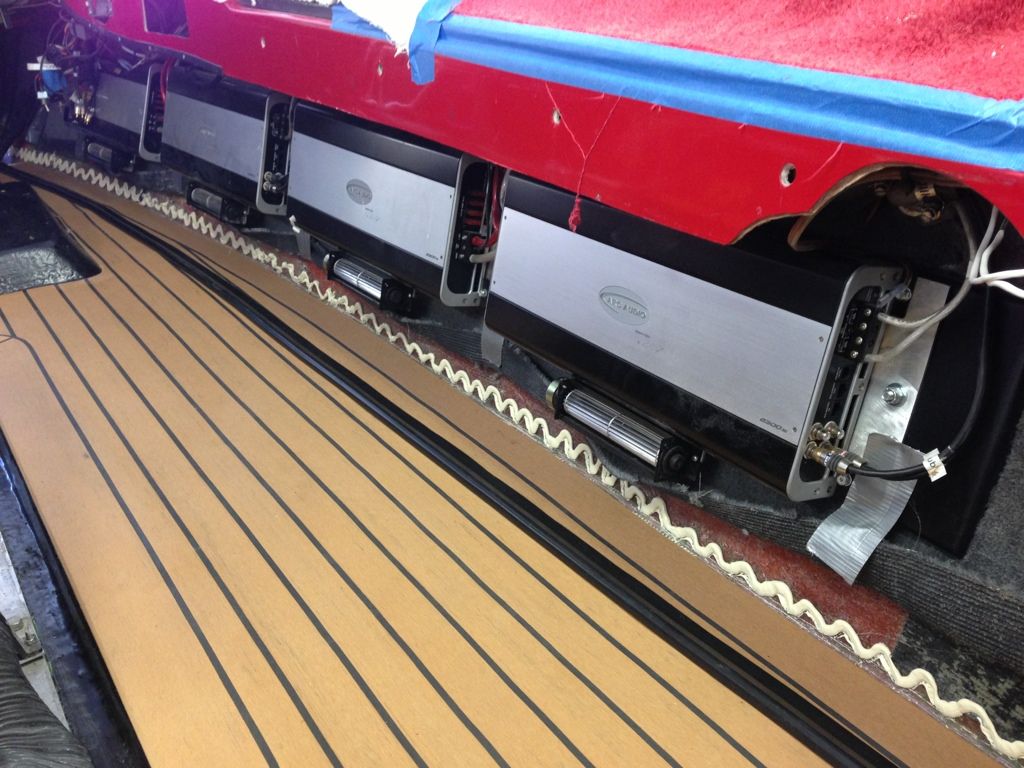
Then I attached the strips to the gunnels
After it dried I trimmed back the carpet re-glued it back in place
|
|
Join Date: Jun 2005
06-10-2013, 6:24 PM
|
Reply
|
Then after everything was glued down I went back and caulked all the edges to fill any gaps at the edges I might have missed
|
|
Join Date: Jul 2007
06-10-2013, 9:10 PM
|
Reply
|
|
Never Cease to amaze me.... absolutely love it
|
|
Join Date: Oct 2007
06-11-2013, 7:24 AM
|
Reply
|
|
Superb G! I'm looking forward to seeing the finished product with the interior installed and the sun shining on it. Absolutely phenomenal!
|
|
Join Date: Jun 2005
06-25-2013, 2:52 PM
|
Reply
|
|
Sorry to be what seem like the posting the same photos over and over but their is a lot of behind the seen's work going on. Major wire projects and power distribution work going in before I can start putting the major parts on. It's very hard to work on the boat at the lake when it's 100+ out so I'm taking her back to the Bay Area to work on her at home after hrs ect
Trying to get serious work done up her when I'm in party mode is next to imposable. So this is the first time the boat has seen the light of day in like 2 years
|
|
Join Date: Apr 2002
06-25-2013, 3:44 PM
|
Reply
|
|
I was sceptical but now proven wrong. Nice work G, looks fantastic.
|
|
Join Date: Aug 2009
07-28-2013, 8:53 PM
|
Reply
|
|
This is truly amazing and something I'm thinking about tackling on my 1999 SAN. Do you have any pics of the floor with the boat all put back together?
|
|
Join Date: May 2012
07-29-2013, 9:40 AM
|
Reply
|
|
Looks amazing!!! Cant wait to see finished pics with the boat put back together. Good job!!
|
|
 Posting Rules
|
You may not post new threads
You may not post replies
You may not post attachments
You may not edit your posts
HTML code is On
|
|
|
All times are GMT -7. The time now is 5:59 PM.
|
|


 Linear Mode
